Cropping
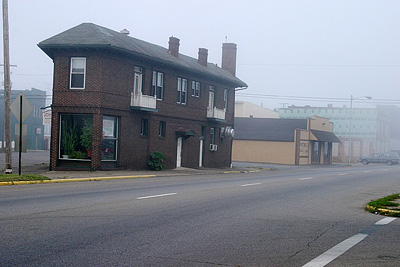
After backing up your image and setting the appropriate color space, one of the first things that you will want to do is crop the image. At this point, if your image is a bit crooked, we can kill two birds with one stone. Also, since the Crop tool works the same in both Photoshop and Elements, we’ll discuss cropping as it pertains to both versions. In our example below, we will straighten our image with the Crop tool.

Crooked image
Click to enlarge.
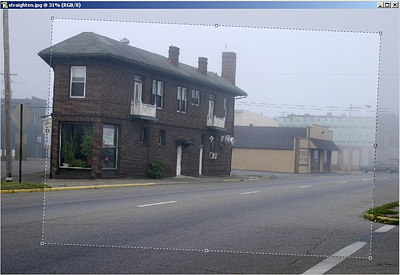
First, select the Crop tool from the Tools palette. Then, draw a crop box within the image (the size and placement isn’t important right now). Now, look for a line in your image that should be perfectly vertical or horizontal. Move your mouse to the outside of the crop box until the cursor turns into a double-sided curved arrow. Rotate the crop box until it is parallel with the edge that should be vertical or horizontal as demonstrated below.

Rotating the crop box
Click to enlarge.
In our example above, we used the left edge of the building as a guide. Once you have the crop box rotated the way that you want it, simply resize the box until the image is framed the way to your liking. If at any time you want to cancel the crop, just press Escape. Otherwise, press Enter or double-click inside the box to finalize the crop.

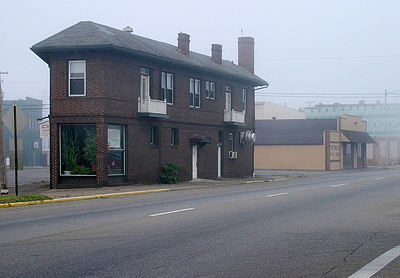
Straightened and cropped image
Click to enlarge.
After that little bit of work, we’ve straightened our image and cropped out some unnecessary space.

Options palette
Click to enlarge.
Another cool thing that you can do with the Crop tool is to specify the output dimensions. For example, let’s say that we plan on printing this image as an 8” x 10” print. Simply type the dimensions in the Options palette. You may have to type in the unit after the number (ex: “in” for inches or “cm” for centimeters). You can also type in the output resolution to the right of the “height” box (ex: 300 ppi). Then, rotate and resize your crop box like we did previously. This time, you will notice that the crop box will retain the appropriate ratio automatically. Now when you press “Enter”, your image will be in the right dimensions for an 8” x 10” print. If your digicam shoots images with an aspect ratio of 4:3 instead of 3:2, you will find this cropping method invaluable in getting your pictures ready for print. We use the Crop tool all the time to make thumbnails for our articles, which must be 60x75 pixels. Just specify “px” as the unit instead of “in”.


20 Comments
View All Comments
vladik007 - Saturday, March 19, 2005 - link
if you're such a hot shot photographer , read dpreview's articles and subscribe to magazine that are FOR pros. This is a sire for hardware geeks , so this little tid bit is great and refreshing.Power to anand and his editors , great job.
vladik007 - Saturday, March 19, 2005 - link
hoppa - Saturday, March 19, 2005 - link
In Soviet Russia, layers adjust YOU.JarredWalton - Friday, March 18, 2005 - link
Great stuff, Stephen. Now all I need is a way to make the crappy, grainy images from my digital camera not look crappy and grainy. (Note to others: The Fuji S5000 shoots *only* in ISO200 or ISO400 modes. So, my options are "grainy" and "really grainy". I'm going to see if I can pick up some halogen lights tonight and maybe they'll help.)CrystalBay - Friday, March 18, 2005 - link
thanks for the toot..blackbrrd - Friday, March 18, 2005 - link
Nice article!More articles like this is good :)
(Don't go the tomshardware way.. 80% of the articles there are useless)
segagenesis - Friday, March 18, 2005 - link
#2 - Wah wah... this is a good article, would you rather have your pictures look like mud?Rocket321 - Friday, March 18, 2005 - link
I found this information very useful and hope to see more photo guides in the future. As an amature this type of infomation is invaluble.Questar - Friday, March 18, 2005 - link
Typical amatuer stuff, adding way too much contrast and color saturation to punch up images.InuYasha - Friday, March 18, 2005 - link
power of phtoshop!